
The most common cause of the 0xc000021a error (Blue Screen of Death or BSoD) is a certain key piece of software or system driver that is malfunctioning.
Another possible cause for this error is a damaged system registry. This may happen because of disk read/write errors, power outages or virus attacks.
If you want a QUICK fix to the 0xC000021A error, then it may be a good idea to launch your PC in safe mode and download Iobit’s Advanced SystemCare.
You can detect and update all outdated, mismatched, missing drivers and resolve disk errors with just 1-CLICK.
Click HERE to Get the Advanced SystemCare and Fix the 0xc000021a error
How to Fix 0xc000021a Using Iobit’s Advanced SystemCare – 3 Easy Steps
Step 1 – Enable Safe Mode and Boot up To Desktop
If the automatic repair fails and your PC does not start correctly, Click “Advanced options”

Click “Troubleshoot”

Click “Advanced options”

Click “Startup Settings” (underneath “Command Prompt”)

Click “Enable Safe Mode”

Select restart. Hopefully your PC will boot to your Windows desktop.
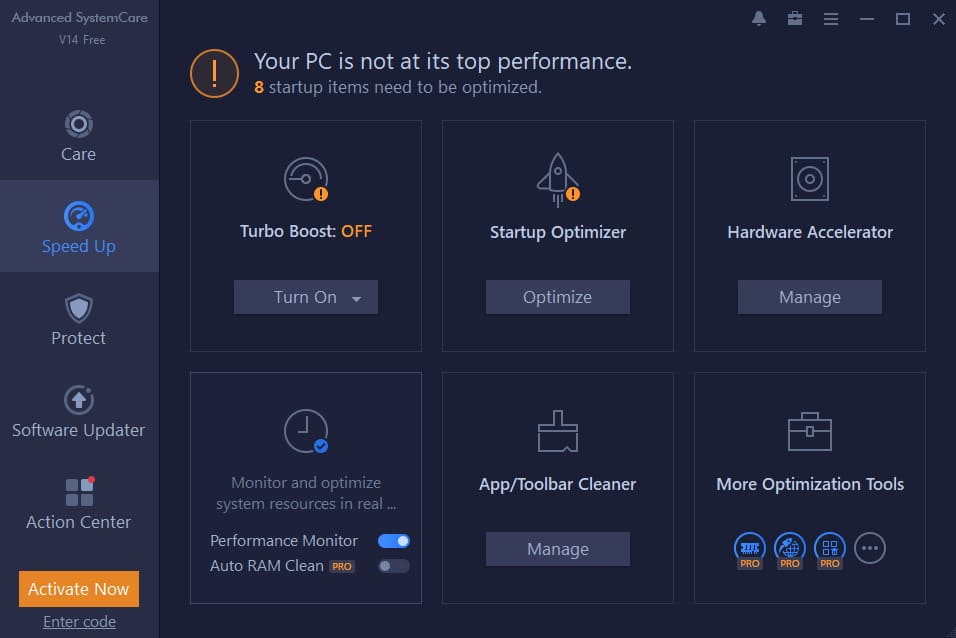
Step 2 – Get the Iobit Advanced SystemCare Software
Setup and launch the software.
Click on “Activate Now” and enter the license code that came with your download.
Step 3 – Fix Issues
Click on the Options menu on the top right and go to “My Subscription”.
Select “Registry Deep Clean” and “Secure File Detection”.
Go to the Care section on the left and select manual mode.
You’ll see features like “Registry Clean”, “Junk File Clean”, “Disk Optimization” and more.
Click “Select All” and run your scan.
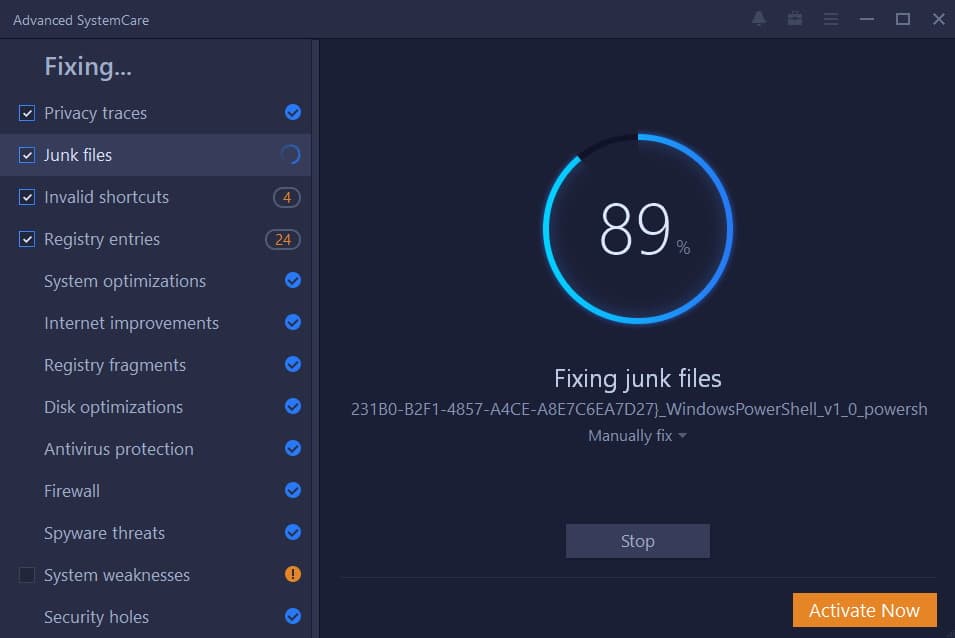
Done !
Other Solutions For 0xc000021a Error
Fix #1 – Uninstall previously installed software or driver
If the error appeared recently after you installed a new piece of software or hardware driver, or any kind of new installation to your Windows system, boot into Safe Mode and uninstall it.
Fix #2 – System Restore
If System Restore was turned on for your computer, you can try and restore the system to an earlier restore point.
To do so, follow these steps to run System Restore in Safe Mode on a Windows system:
- Restart the computer
- Press and F8 key to boot into Windows Advanced Options Menu
- Using the arrow keys, select Safe mode with Command Prompt
- Hit Enter
- Login as Administrator
- When Command Prompt Appears, type the following command and press Enter:
%systemroot%\system32\restore\rstrui.exe
- Follow the instructions on the screen to restore your computer to an earlier time
Fix #3 – Run a SFC Scan
1. Boot in to safe mode.
2. Click on the start menu and type in cmd then right click on the program and select “Run as administrator”
3. When the black window pops up type in sfc /scannow and hit enter. This command will scan all protected system files, and replace corrupted files with a cached copy that is located in a compressed folder at %WinDir%\System32\dllcache.
4. When the scan has finished, reboot your machine.

Fix 4 – Update Device Drivers
There are times when a device driver becomes corrupt or has a bug in it which can cause the stop code 0xc000021a error. To update your device drivers follow these steps.
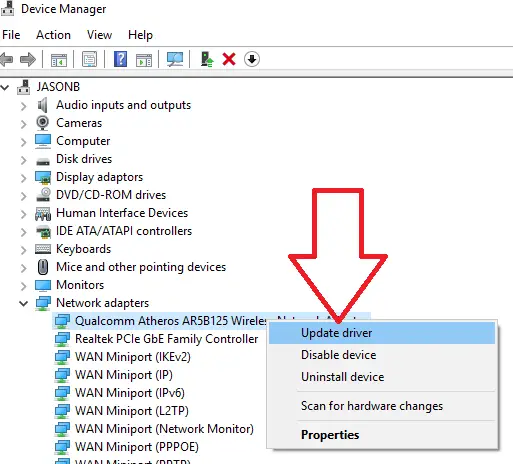
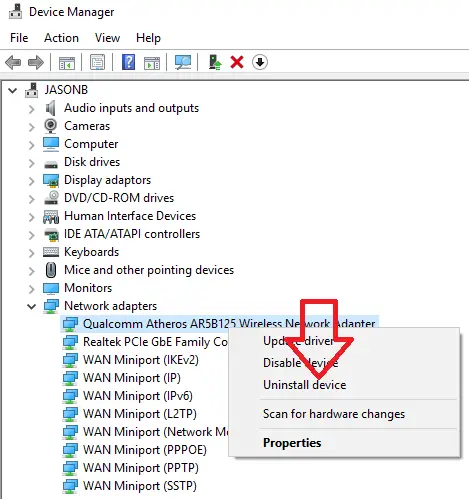
- Open up device manager (Click start, type in “Device Manager” and hit enter) Now expand the driver that is causing the issues (ex. network adaptor)
- Right click on the device and select properties, then click on the driver tab and note down the driver date and version. (The version is 3.0.2.201)
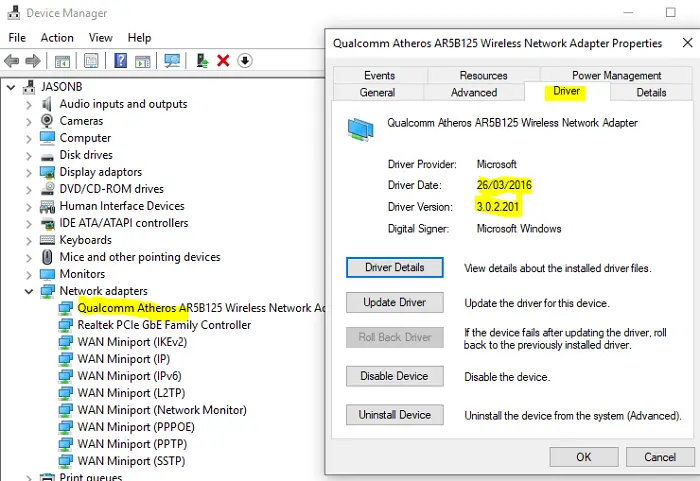
- Now search on the internet for an updated driver. In this case, we would look for a driver newer than 26/03/2016 or 3.0.2.201. Download that driver and save it to your machine.
- Now head back to device manager and right click on the device and select update driver, Follow the prompts to update.
- Restart your machine after the driver has been updated. Monitor if your machine still has the stop code 0xc000021a issue. If the issue is still happening continue to the next step


Fix 5 – Re-Install Device Driver
Updating the driver should of resolved the issue, but sometimes if the driver is corrupted it needs to be uninstalled and re-installed. To do this follow these steps
- Open up device manager (Click start, type in “Device Manager” and hit enter) Now expand the driver that is causing the issues, right click on the device and select “Uninstall Device”
- When the driver has been uninstalled reboot your machine. This will completely remove the driver from your system.
- The driver should auto install when windows 10 restarts.
- Go back in to device manager and right click on the device and select update driver, Follow the prompts to update.

Disclosure: The links on this page may be affiliate links and may give us a commission to run the site with no extra cost to you.
Be First to Comment